|
Grafting Mrs. Grimmet's
Grafting is tricky enough when it's stockinette stitch. But when it's time to graft something in a pattern, it can be daunting.
Thankfully, we have a handy cheat.
To use this method, plan ahead by casting on in a contrasting color (CC1) yarn. Then in a second contrasing color (CC2) work a row in pattern, then switch to the working yarn to continue the pattern.
Then at the end of the piece, work the same pattern row in the same CC2. Now bind off in CC1.
Having laid this groundwork, all you need to do is to follow the path made by the CC2 yarn where its stitches integrate with the working yarn at the beginning of the piece and at the end of the piece.
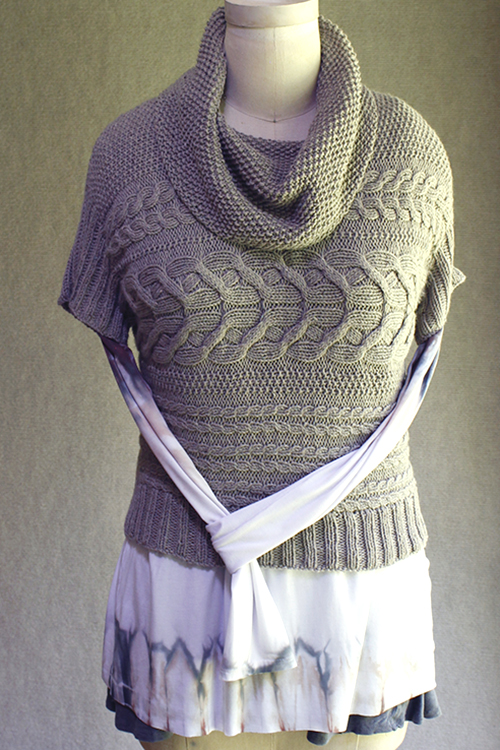
Here is how it works for Mrs. Grimmet's Weskit, and the same technique can be used for Mrs Grimmet's Pullover, or anytime you need to graft in pattern:
Preparing the scene
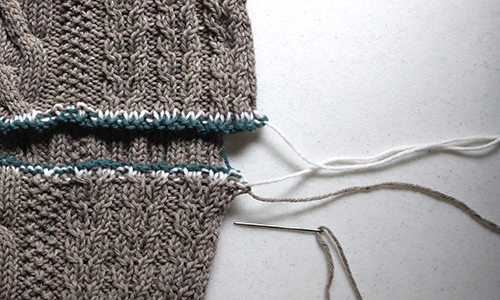
Here's our weskit with the cast-on (top) and bind-off (bottom) rows worked in CC1 (green), and the adjacent rows worked in CC2 (white). It's this white strand whose path we'll be following.
We cut our working yarn to a nice length after its last WS row, and it is threaded and ready for grafting.
We are grafting end to beginning, so the results will be jogless.
Our graft will follow the path of the white CC2 yarn where it interacts with the working yarn.
When stitching into the beginning (top), the needle will be passing through both legs of a single stitch, following the path of the white yarn as it loops around that stitch.
On the ending (bottom), the needle will pass through the left leg of one stitch and then the right leg of the next one, following the path of the white yarn as it loops through one leg and then the next, as follows ...
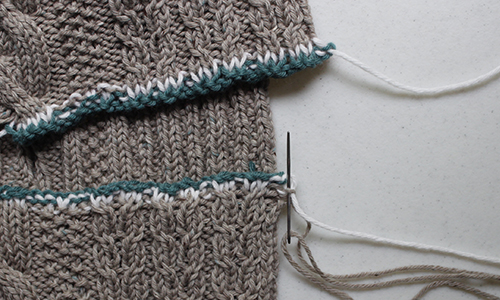
Start at the stitch where the working yarn ended its last row. Follow the end of the CC strand where it enters that stitch.
(For this first pass through on the bottom, we only go through a single leg of the first stitch)
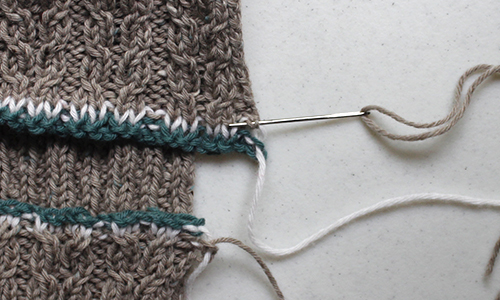
Now on the top, follow the loop of white yarn as it runs behind the first full stitch.
(Note: Depending on which size or style of Mrs Grimmet's that you've knitted, the order of your knit or purl stitches may vary somewhat from those pictured here. )
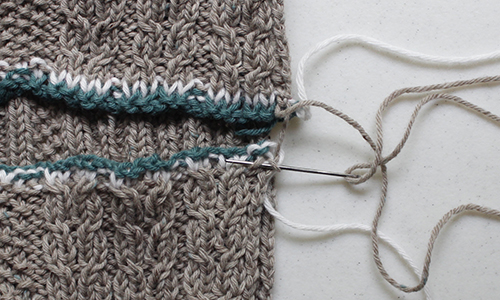
Now on the bottom, follow the white yarn as it loops through the left leg of one stitch and the right leg of the next.
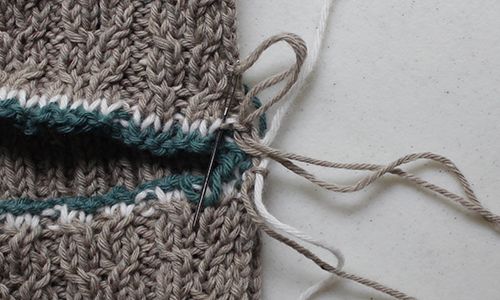
Back on top, here the white strand loops to form a purl stitch. For this, it may take two swipes with the needle - first up then down, to complete the loop.
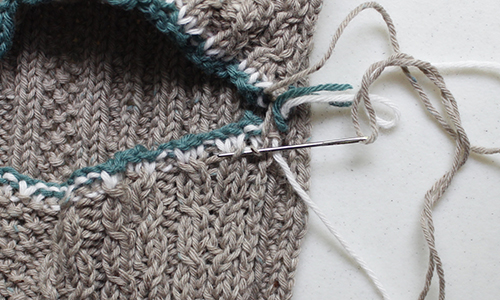
Back to the bottom, continue to follow the loop of white yarn wherever it leads - this time it is going down through one leg of a purl stitch and then behind the right leg of the next knit stitch. But you don't have to think about whether it's a knit stitch or a purl stitch ... just follow the loop of white yarn.
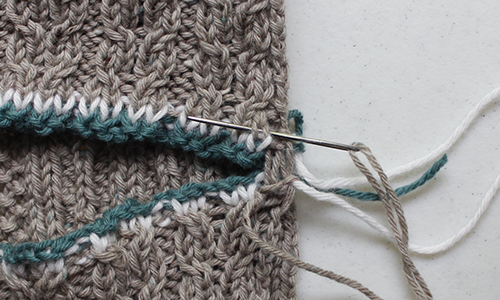
Back to the top, here the white yarn loops behind a knit stitch.
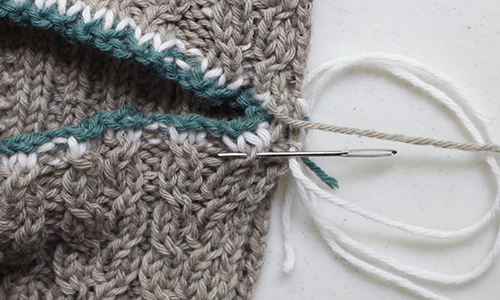
On the bottom, don't worry that the working stitches are a little twisted from the cable below. Just follow the white yarn as it loops through them.
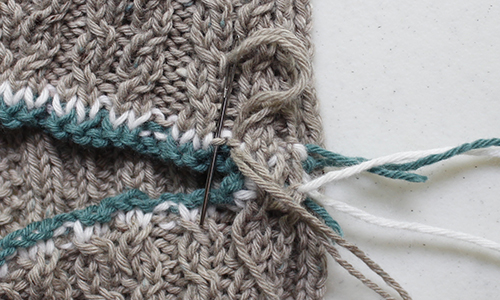
On top, the white loop forms another purl stitch. These are most easily worked in two steps ... up, then down.
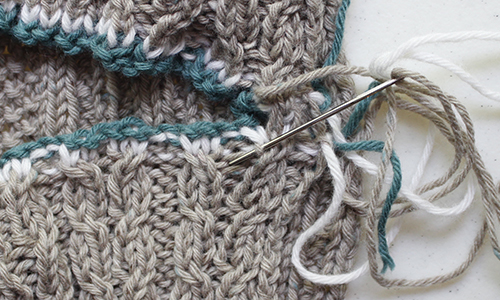
And here on the bottom, the white strand loops through first a knit leg ...
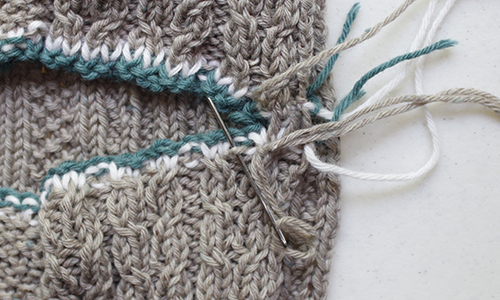
... and then a purl strand. No worries, just follow the white loop.
And so on, following the white loop on the top, then on the bottom, until all the stitches have been worked.
Remove the scrap yarn.
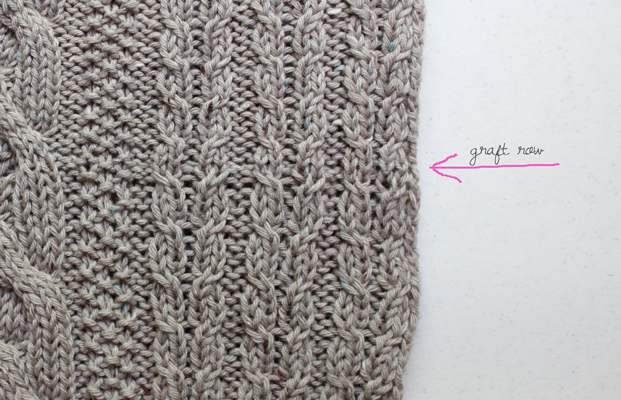
Even out graft stitches as needed.
|
